

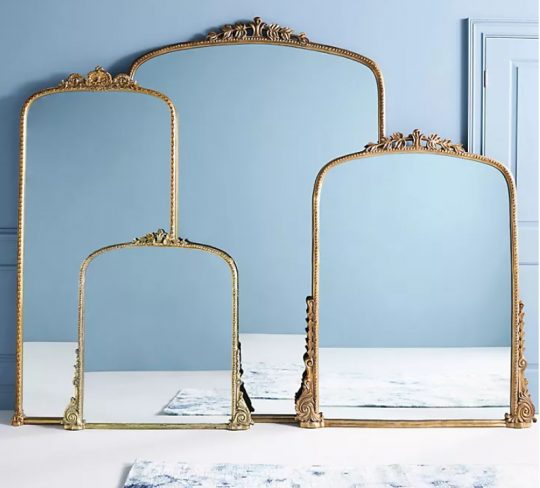
The idea for this DIY came when I was watching a cake decorating video and the cake decorator was making a very grand Victorian cake. I remembered the Anthropologie mirrors that cost hundreds of dollars. It’s called Gleaming Primrose Mirror, look it up. I found one on Amazon for 20k, if you are in the mood to spend that much, I will add a link to the mirror at the end of this blog post.
.
What is the Victorian Style of Interior Design?
Victorian was the style that was popular when Queen Victoria was in power. There are strong architectural and decor references from the Victorian era that are popular today. In the Victorian style of decorating you will see a lot of ornamentation, plush velvets, lots of rich tapestries, deep jewel tones, damask patterns, generous use of gold gilding, and furniture with grand carved details. I personally think it’s timeless, just like the Indian Antique style. I am very drawn to some Victorian elements and plan on mixing some with my style of decorating. Will try and recreate a vignette sometime.
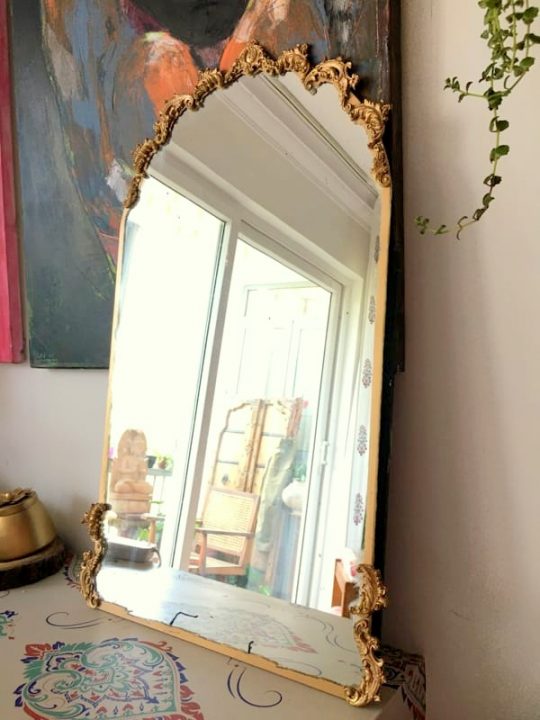
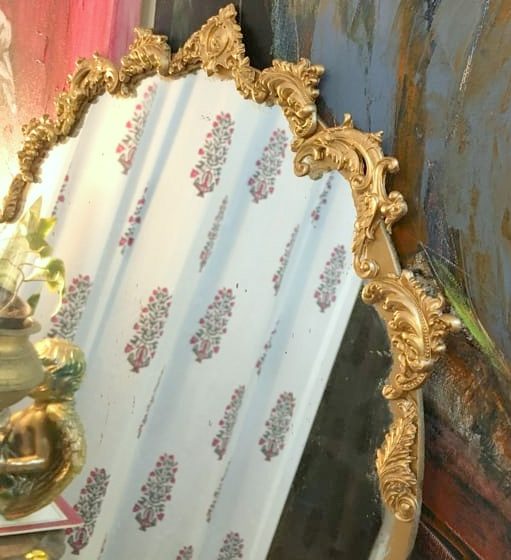
Here is the mirror I created.
Jumping straight to the DIY!
Materials needed
- A Frameless Mirror with a half-round shape on one side.
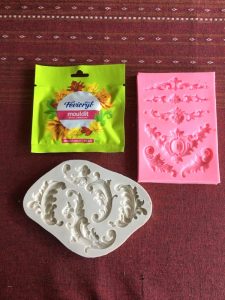
- Silicon moulds with ornate designs. I used this and this.
- Feviol Mouldit. I bought it from a craft shop, you can buy it online on Amazon here.
- Talcum powder and brush to dust the silicone mould.
- hot glue gun with a glue stick
- Gold spray paint, if you are an Amazon buyer, here is a link.
- spray water bottle and steel wool if necessary (will explain why in the description)
Here is how I did it.
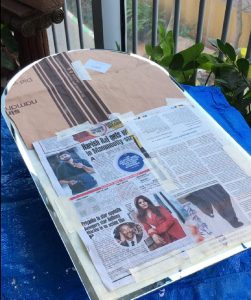
- I had an old broken mirror that I took to the glass cutter and got cut to the shape. It was a rectangle broken diagonally, I simply got him to cut the broken side into a half-round. This part unfortunately cannot be DIY’ed unless you know how to cut glass. So I suggest you go to your local glass cutter and get it done. Mirrors are not very expensive and better cut by a professional.
- Before you start making anything, look at your silicon moulds and chalk out a rough pattern you want to follow. Which piece you would want in the center, and how many on each side. Victorian accessories are all about symmetry, so plan first before you jump in.
- Fevicol mouldit comes in small packs that are easy to work with. The two parts need to be mixed well together to activate the hardening. It takes about 90 minutes for it to harden completely so you have a good 10 to 20 mins’ time to work with it. Also, it’s an epoxy compound and is toxic if ingested, so keep it away from children. If you are one of those who need to keep touching your face and eyes, then wear gloves or wash your hands thoroughly after use.
- Next, we put some talcum powder in the silicon mould and push it into all crevices using a brush. Remove the excess talcum powder. This makes sure the epoxy compound doesn’t stick to the mould and comes out easily. I got two silicon molds. One for the crown and the other for the feather-like details. They are mostly used to decorate cakes. I wanted a slightly larger one but couldn’t find it.
- Take small quantities of the mixed mouldit and push it into the mould. Expect it to raise and not be flush while you are doing it. It’s completely ok. Ensure you are pushing the mouldit in every small detail of the mould. If you have excess mouldit on top making a mound, trim it with the back of a knife. You want your 3d pattern to sit flush against the surface it is placed on.
- Once the mouldit is filled in the mould and its flush against the mould, leave it alone for ten minutes. I prefer taking the pattern out when it is still a little soft because then I can lay it on a flat surface for it to dry completely and then use the mould to make more.
- Then, I made multiple sets of the 3d patterns, and let them dry out completely.
- Taped the mirror to expose about half an inch on all sides to create a frame. Then I took it out on a well-ventilated balcony and sprayed it with gold spray paint. I used an automotive spray paint that I got from a hardware store. I find them more affordable, quick-drying, and of better quality.
- While the mirror frame dried, I spray painted the 3d patterns in the same gold color. I let them dry for 30 mins.
- Then came the fun part of putting it together. I laid out my patterns one last time on the mirror where I wanted them and then glued them on with hot glue.
- Hot glue dries almost instantly, so at this point, it’s all done. But the spray paint is dry to the touch but has not cured fully. which means if you use some glass cleaner solution and steel wool, you can scrub it off.
- I sprayed some glass cleaner and used a steel scrub to scrub off any excess spray paint that did not want. Wipe it clean and let it dry completely. Unfortunately, this was a spontaneous decision and I did not film this part of the process.
- Finally, I set it aside and styled it for the photos.

You can watch the entire process of DIY creation in my idea pin on my Pinterest Profile HERE.
In my opinion, the DIY is a 7 out of 10, I like my DIYs to look professional and not crafty and this is not there yet fully. It looks fabulous in photos, it looks fabulous in person, but when you take a real close look, you see the imperfections. There are so many things I would do differently now. For example, I should have spray-painted the 3d patterns on both sides simply because the back can be seen inside the mirror. I would skip creating the half-inch frame on the half-round and let the pattern define the shape there. But this was a good try. Happy with the way it turned out.
I haven’t found a place for it yet, but when I was tending to the plants on the balcony, I moved some plants in front of it and I really love the green of the plants with the gold and the mirror. So it is definitely going to find its way around plants.
Did you like this DIY?
Would you try a version of it? Do let me know in the comment below. And finally, here is a link to the Gleaming Primrose mirror I found on Amazon.
Leave a Reply