

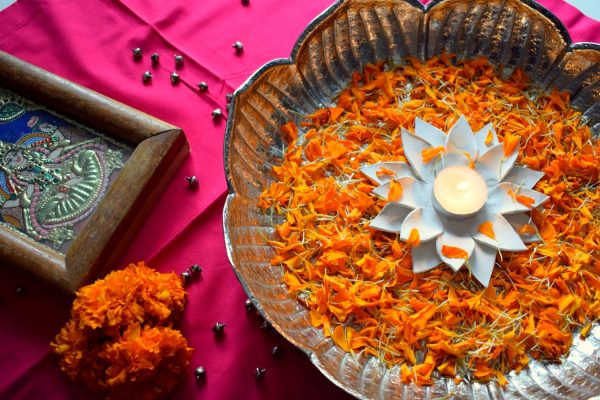
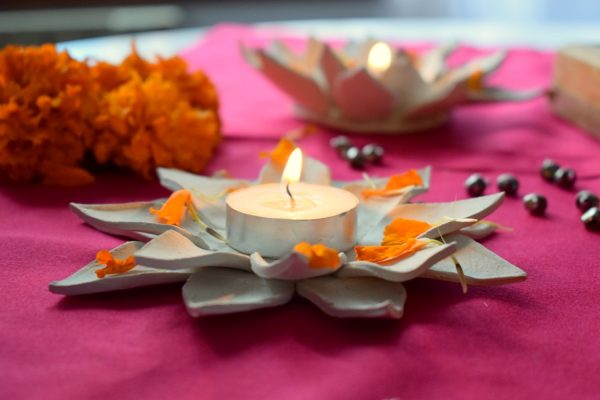
This post is about how you can make your own Lotus Candleholder using air dry clay. This the also the first post by Padma who is a part of Team Preethi Prabhu.
Ma’am (Preethi Prabhu) is the inspiration for all my DIY’s. An idea that runs through my mind, I share it with her and almost immediately she says go-ahead, every time. We try lots of DIYs out of which a few turn out really nice, and touch our heart. This is one such DIY that touched all of our heart and made us happy. Whenever I look at it I feel proud that I made it.
So let me tell you how I did it.
Things you will need:
- Air dry clay ( we had a 1kg packet, we used half a packet to make 2)
- Paper Cutter
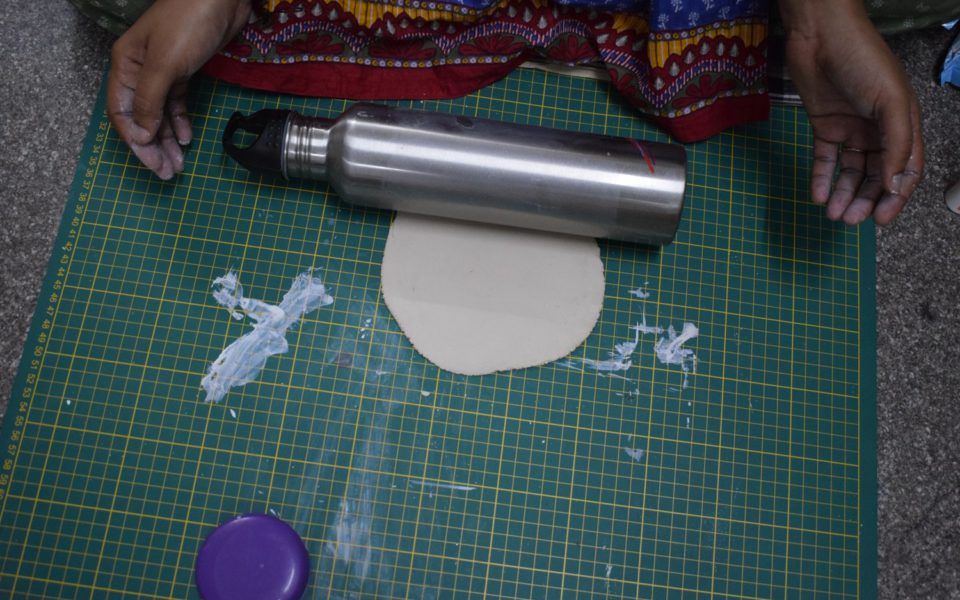
- Rolling pin ( We did not have one in the studio so we used a water bottle)
- cardboard (To cut a leaf template)
- Jam bottle cap or any round shape (as big as you want your candle holder base)
To make a Cardboard petal shape template:
Take the cardboard, draw a petal/leaf shape by drawing cone in any edge of the circle. (size of your choice preferably not very big, i have used 1.5cm) Once you are satisfied with the shape, cut it out.
Step-wise tutorial to make clay lotus:-
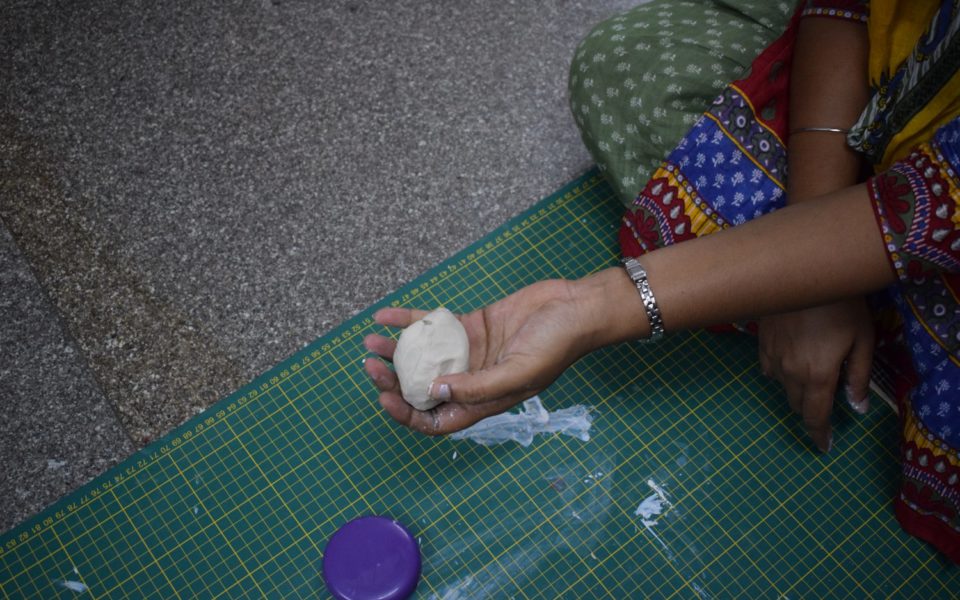
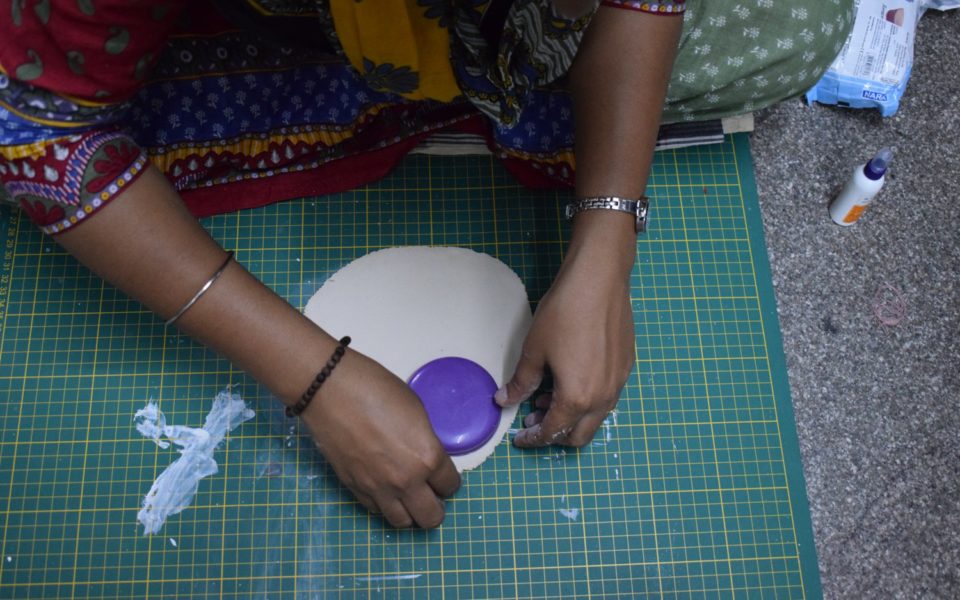
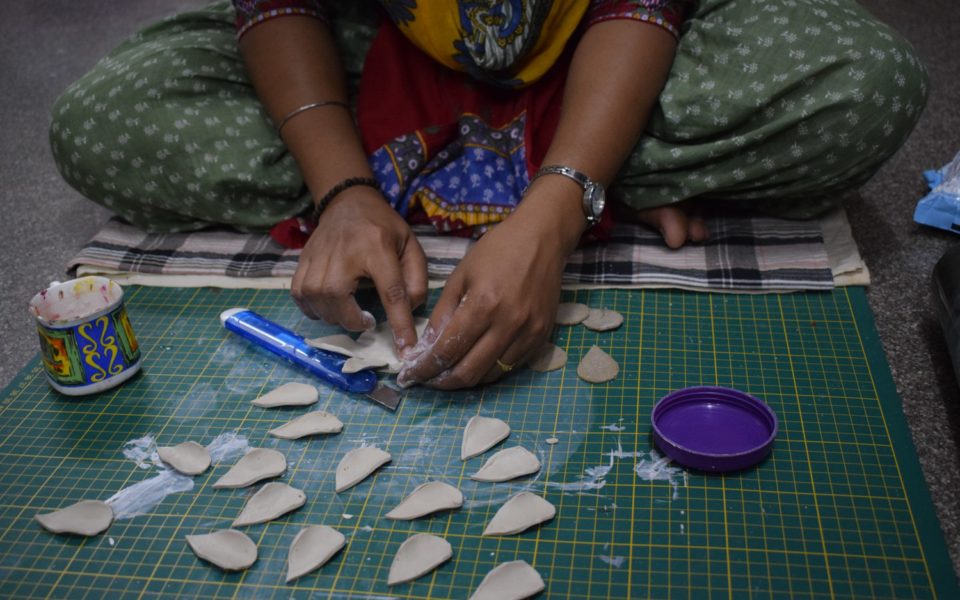
- Take air dry clay and knead it (don’t add water if it is too dry, your end product will crack too easily) for a while to get a good consistency. Roll it using a rolling pin into a sheet, not too thin.
- Mark with the round jam bottle cap cut a big round shape using the paper cutter for the lotus base. Place it on a plastic sheet, and it will stay on the plastic sheet till it is fully dry.
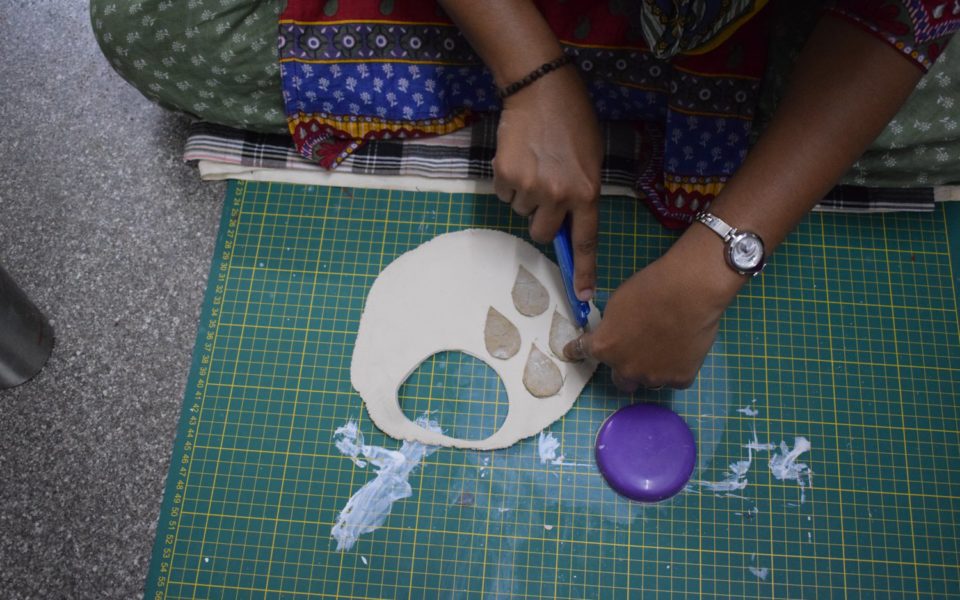
- Roll some more clay, and then keep the cardboard petal shape on it for reference. Using the paper cutter again cut along the shape to make lotus petals.
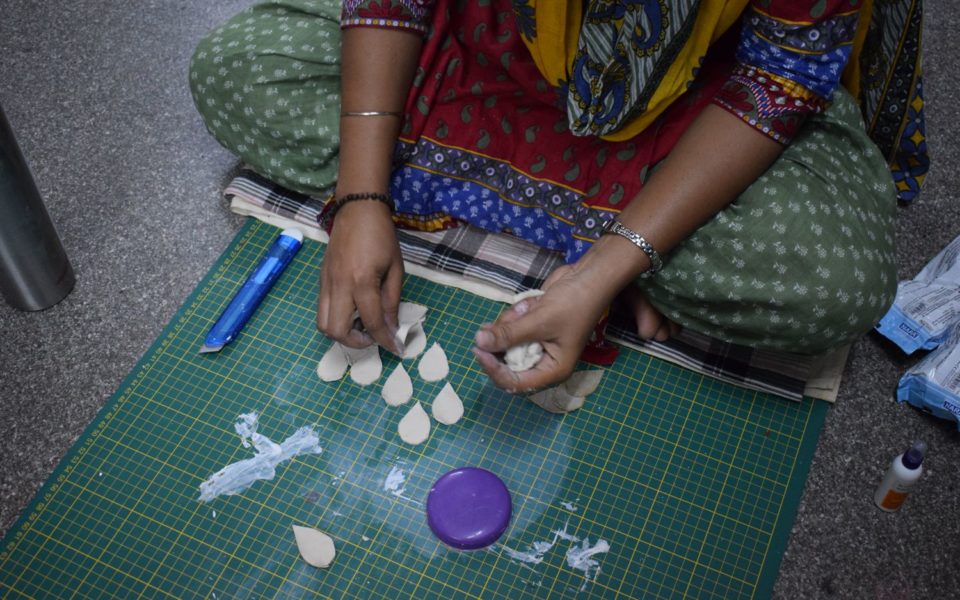
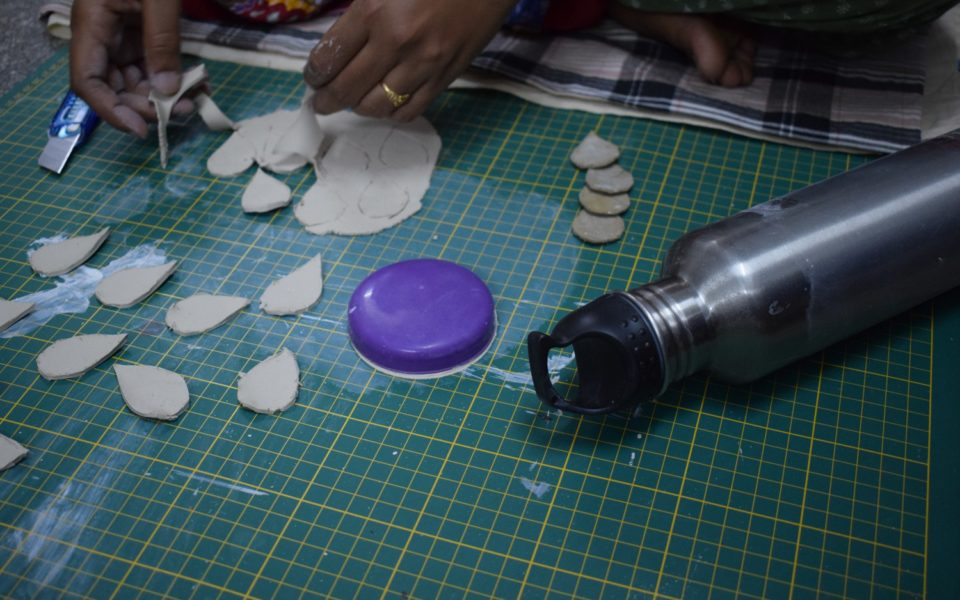
- The number of petals you make depends on how big is your candle base is and the number of layers you want.
- Smooth the edges of the petals with your fingers dipped in water to remove the roughness.
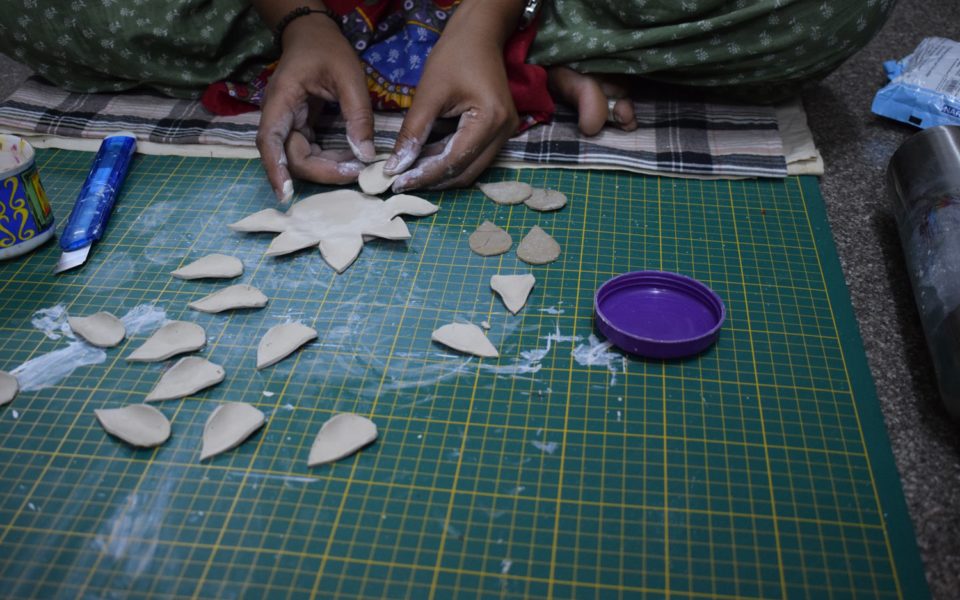
- You can count the number of petals you will need by roughly arranging them around the base.
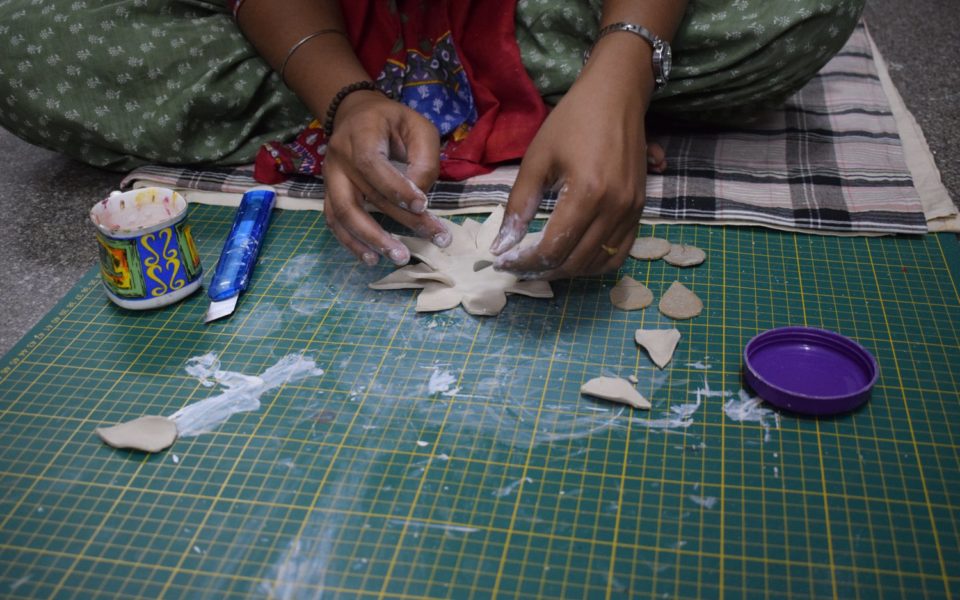
- Cut out as many petals as you need start fixing it to the base by pressing the petal into the base until you get a smooth surface. (Where the base meets the petal, score the base with your cutter to ensure it sticks better)
- Work continuously till you complete all your petal layers.
- Depending on the humidity in the air, dry your creation for a day or two. You can paint it with the color of your choice after it is completely dried. We liked the unfinished look, so we let it be.
Watch the slider for the step by step images

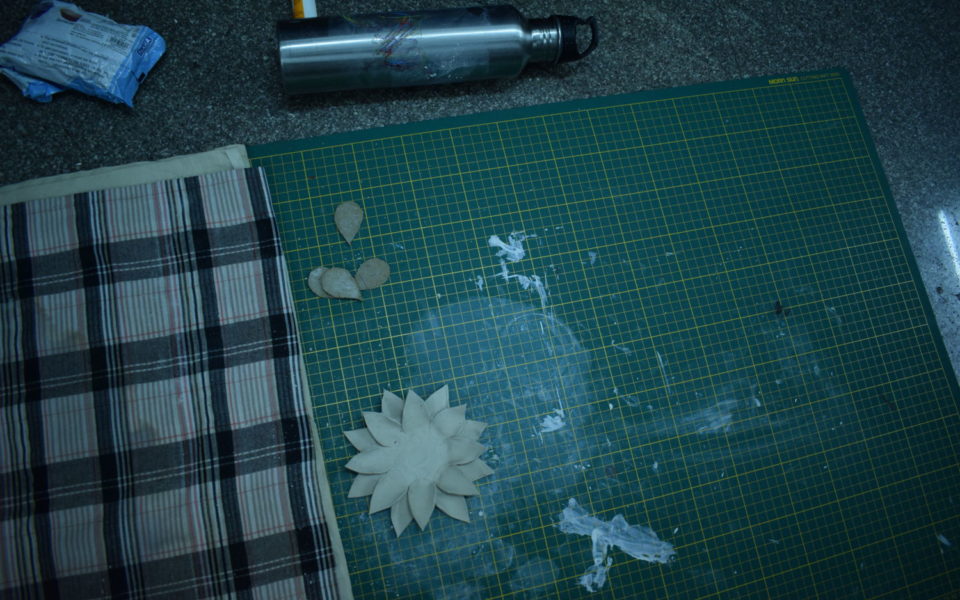
Note: This lotus looks absolutely gorgeous, but can be a little delicate. So handle it with care.

P.s. This DIY will need to be done in one sitting as the clay starts to dry.
Leave a Reply