

This is another super easy DIY that anyone can do using kabab skewers. I had seen this idea on Pintrest or Youtube I am not too sure, hence not able to tag the source. This one is my version of that DIY.
Another one of those DIY’s that I just had to try just so I can satisfy my curiosity. The best part of this DIY was I just had to buy one supply and that cost me 20 Rupees only. When you have most of the supplies, the motivation just increases exponentially. Also, I have made a note of all the DIY requests I have received and will start work on that soon. One request! Please please dont ask me to do decoupage or macrame, I know a lot of people are doing it and doing it well, so there is a ton of content available online for that. I would like to try DIY’s that are generally difficult to do in the Indian Context, with the supplies available easily.
For this DIY, you will need
- Long bamboo kabab skewers (I already had them with me and they were a foot long)
- A paper cutter
- 220 sandpaper 1 sheet
- Glue gun and glue sticks
- M-seal (We used 2 packs of 10 rupees each)
- Black Spray Paint
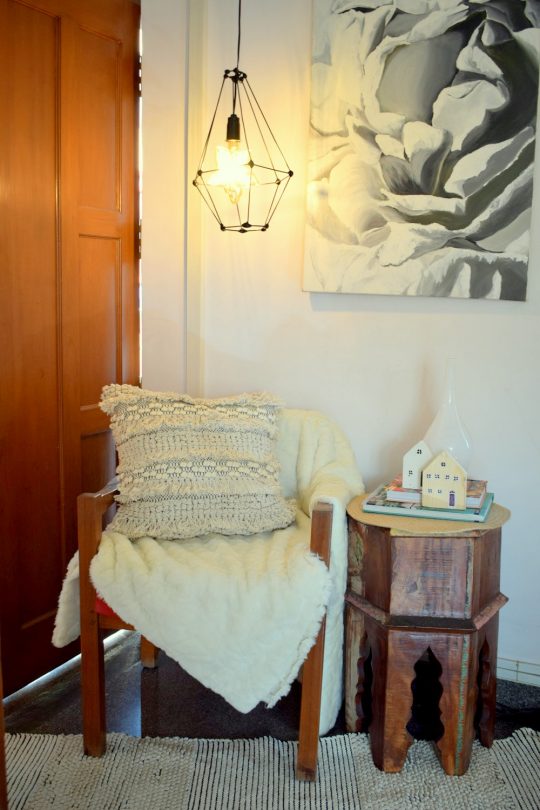
- Lamp kit and bulb (I have used a custom made holder and wire set with a star shaped Edison filament bulb, ready kits are available in super markets)

How I went about the DIY:
- I wanted to try an octagonal shape, but I settled for a hexagon coz it was turning out too complicated.
- I marked and cut 6 pieces each of 5 lengths. 11 inches, 5.5 inches, 5 inches, 2.5 inches and 1 inch. The cutting took some effort coz I was using a paper cutter, a hacksaw blade should be faster.
- I sanded all the edges smooth and lined them according to their sizes. The sanding is an important part else the splinters will look bad and ends wont bond properly.
- With the 5 inch pieces, I placed them into a hexagon shape and them used the glue gun to stick them together. I repeated the hexagon making process with the 2.5 inches and 1 inch pieces. The gluing was a good learning. I kept squeezing a lot of glue out in a hope that it will bond better, but the shape was going out of form. Finally I learnt, that using a tiny blob of hot glue to bond 2 sticks was much more effective. (Lesson learnt after wasting some glue and burning fingers)
- I let them dry completely before I attached the longer pieces. I connected the corners of the 5 inch hexagon to the corners of the 2.5 inches hexagon. This forms the bottom grid.
- Then I connected the 1 inch sides hexagon with the 5 inch sides hexagon that makes the top grid. At this point the shape was good and probably it would even hold together coz of the hot glue. But i wanted to reinforce it more. So I let it completely dry before moving on to the next step.
- So hot glue, when it dries, it takes weird shapes, so its important to use a paper knife and carefully cut off the excess from everywhere.
- Next I mixed the two parts of M-seal and used tiny balls to cover the nodes so the glue is covered and the bond is stronger.
- M-seal need some time to dry so we let it dry overnight. Dont rush the drying process, if you spray before it is fully dry, it wont get any air and can turn brittle.
- Spray painted it black. It needed about three coats to cover completely and we were ready to style.
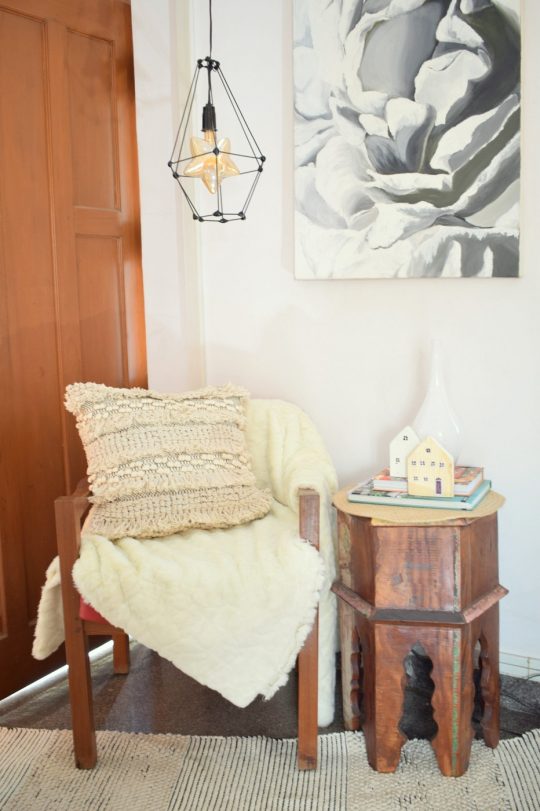
I love how this turned out and I now want to try out more shapes. This will be perfect for events styling, where you are too stretched for budget, spend some time making sure you are getting a good finish and no one will know its DIY.
I was so busy doing the DIY that I did not get in between shots, but I think the video should give you a good idea. The only and only thing to take care of is not to use too much hot glue and you should be smooth sailing.
Have you tried any of the DIY’s that are published on this blog? if Yes, tag me on social media with #postitforpreethi
Leave a Reply