

This post is about how you can change the upholstery of chairs that have the seat and backrest fixed to a frame with screws. We will get to the slightly complicated one in a different post. If you keep in mind a few simple steps, you can change the upholstery of any chair or sofa that sits on a frame.
Change upholstery
I have been fascinated with being able to change upholstery ever since I was a kid flipping through design magazines. Was petrified with doing it myself, but after the first attempt, there was no looking back. If you love changing upholstery yourself, these basic tools should start you up.
- A good pair of scissors.
- A staple gun. This cuts the work time by a quarter. More about basic tools here.
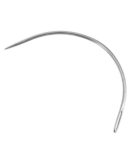
- An upholstery needle. Since you are going around curved edges, a straight needle just wont do the job. You can finds these needles in a regular sewing supplies store.
Here are the instructions:
- Flip the chair upside down to inspect the underside. Mostly the seat and the backrest will be in kept in place with a couple of screws. Unscrew them and separate the cushion from it. Make sure you keep the screws carefully, you will need them again.

- Before you rip the old fabric out, take the new fabric to measure the fabric needed for the seat or the backrest. You will need to cover the top, sides and leave a little seam allowance to staple the fabric in place. Don’t cut yet.
- Carefully remove the old upholstery fabric, depending on how it has been fastened. If there are too many nails, use a pair of pliers.
- Once the old fabric is out, place the new fabric in place and adjust the pattern to how you want it on the top of the seat. When you are satisfied, flip it over, measure and cut the fabric out.
- Staple one side of the fabric first, then pull the fabric firmly and staple the opposite side. Staple the remaining two sides and finally do the corners. (I was so busy making sure the design is lining up, that i forgot to take pictures of this step)
- Trim any excess fabric. Cut some regular kora cotton fabric the size of the base, sew it or staple it to cover the bottom panel to get a neat finish.
- If the chair has a backrest panel, repeat the process. We had to hand sew the back panel of this chair coz staples would look ugly. This was where the needle came in handy.

This particular chair, I even spray painted the frame matte black.
P.S. If you are not very sure of how to put it together for your chair, take a picture at each step of taking it apart. Then you can put it back together just by looking at the photos in the sequence.
I also changed the upholstery of this baby chair, since the seat is made of plastic, I could not staple it. So I had to sew the cover like a pocket with a sewing machine and then insert the seat into it and then hand sew the rest. I love how it turned out.
The next one, I am looking at doing a slightly complicated one. Maybe a fully upholstered one or something. Not sure yet, but you will get to see it right here.
If you have a chair or a sofa that you have been wanting to reupholster or have already reupholstered it yourself, do send me a picture, i would love to take a look.
Leave a Reply