

This post is about how you can make ordinary colored paper or handmade paper look like a hundred year old without much effort. It can be done by kids or adults, and using ingredients that are available in every household.
One of the things I really enjoy doing is executing an idea that is in my head, just for curiosity’s sake. In between projects, or even in the middle of one, when I have this worm in my head, I just have to have to try it out, or else my head might just explode and I will die. This was one such project, and I am so so thrilled with how its turned out.

This can be art in itself. And it is so so easy to make its not even funny. So lets get started.
What you will need
- Paper A4 size, so you can print stuff on it (I have used bith plain colored paper and handmade paper and I love the handmade one better)
- Instant coffee powder or black coffee (I used the left over coffee powder stuck on the instant coffee powder bottle)
- A bowl and a paint brush
- Some water
- Printer to print on your antique paper.

Once you have all these things, Its time to dive in. Here are the steps.
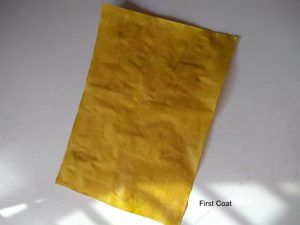
- Pour some black coffee in your bowl and with your brush, simply paint one layer of coffee on the paper all over. (dont go over and over in one place, you may tear the paper. Its perfectly ok if you did not get an even coat. Thats what we are aiming for)
- Let it dry, I let it sun dry. If you are impatient, you can dry it with a hair dryer on the lowest speed. Make sure you dont burn the paper with the heat.
- If you want a darker brown overall, repeat step 1 and let it dry.
- Next brush only on the corners and edges so you get a darker shade of brown like the vignette filter.
- Let it dry. The drying is the most important part coz you will see multiple shades emerging as you paint layer and layer of coffee on top.
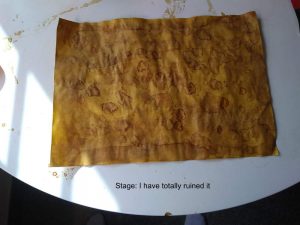
- This step is the fun part and I call it random distressing, replace your paint brush with your finger. Just dip your finger in the coffee and tap somewhere on the paper and repeat.
- Again dont worry if its not perfect, stop when you feel like and let it dry. This is the “I ruined it” stage. It will look all made up and bad, dont worry, we are getting there.
- Once its dry, you will see a lot of dark outlines, brush strokes and abrupt edges in your paper. If you dont, then you’ve not done it right. The next step is to get back to your paint brush, wash it well and use clean water and brush one layer evenly. It fades out the rough unevenness. If you are not satisfied, dry it and brush another layer of clean water.
- The layers and layers of liquid brushed on the paper, gives it a very antique texture and the color of the coffee provides the effect. Your paper is ready, but will be complete after you print your calligraphy on it.
- On the handmade paper, I have printed out Devanagari Calligraphy by Mahendra More, its the Indian National Pledge.. I printed his calligraphy, just to test my paper and do not intend to use it for any commercial purpose. Please check copyright before you print someone elses work for commercial use.
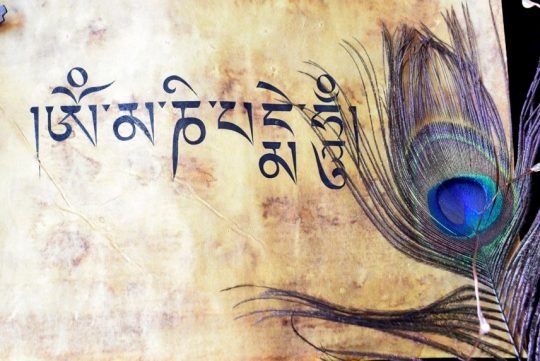
- Its when you print something on the paper, is when the true antique character of the paper emerges. If you have a black and white printer, change your font color to grey to get a dull print. I forgot to do that on the plain paper one, but I love how its turned out too. I downloaded the image of a Buddhist prayer (om mani PadMe hum) and printed it.

- Frame it, style it and prank people saying its a few hundred years old and is worth a fortune.
Here is a video we tried.
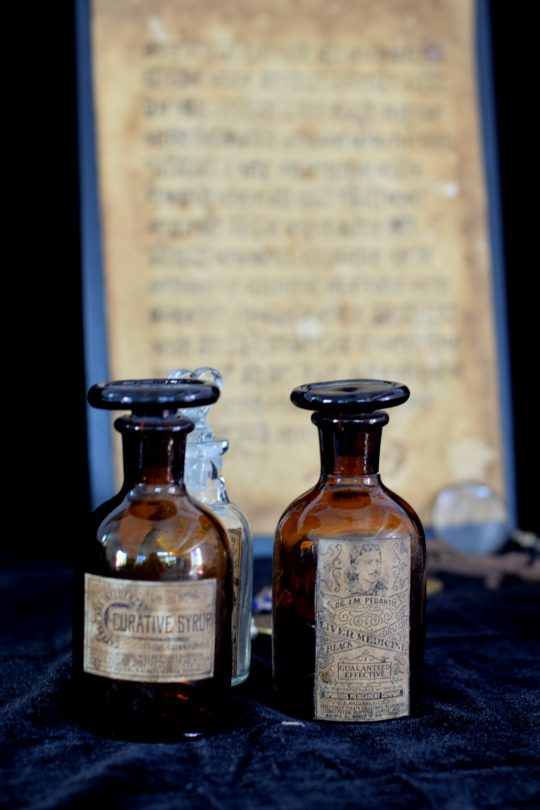
These are new apothecary bottles with new labels(I bought them on etsy) that I used the same technique to distress. Anybody for some curative syrup (maybe it should have been creative syrup) ??
P.s. I just realized I am hitting 1.5 million impressions a month on Instagram. Yyyayyyyyy!!!!
Leave a Reply