
This Post is about how you can make your own stencil to print multicolored block print like motifs. The stencil can then be used on walls, on furniture and even on fabric.
I’ve been block print crazy for like ever now. I even took a one month intensive course of wood block printing. It was physically exhausting to be printing from 10am to 5pm every day, but it was one that I enjoyed to the fullest. I want block prints everywhere. In clothes, home linen, on the walls, I even insist husband wears more block print than the boring western formals.
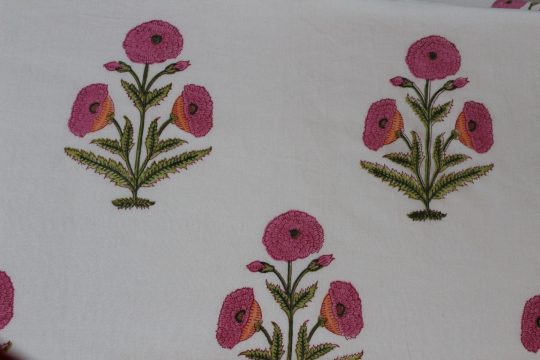
I took inspiration from this traditional indian block print to make a stencil to print on the wall. It was a crazy fluke idea that I shared with Girija, and she is always in on any kind of crazy that I suggest. She even sketched the design free hand. Thank God for friends who can draw coz I cannot even draw a curved line without messing it up.
Supplies you will need for making the stencil
- An inspiration block design ( if you dont have anyone who can draw it for you, use google and print it out in a size you want)
- OHP sheets ( number based on how many colors your inspiration block has)
- CD marker.
- A sharp paper knife
- Cutting mat (very very important)
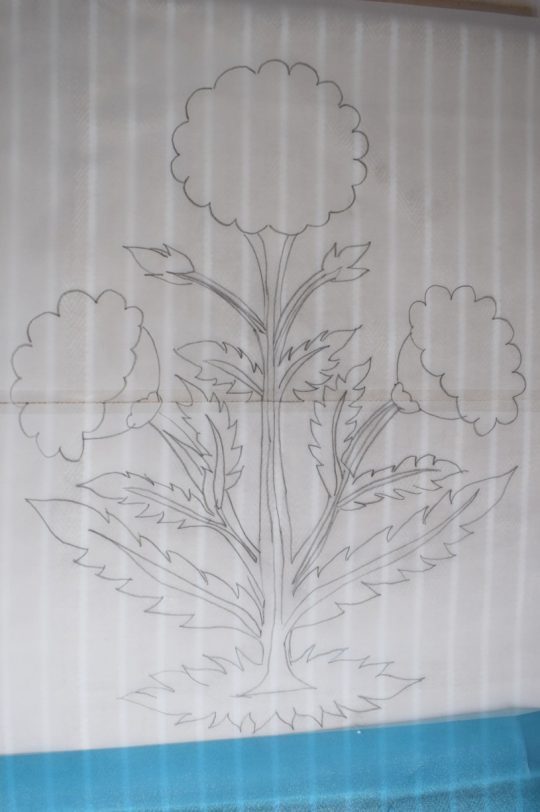
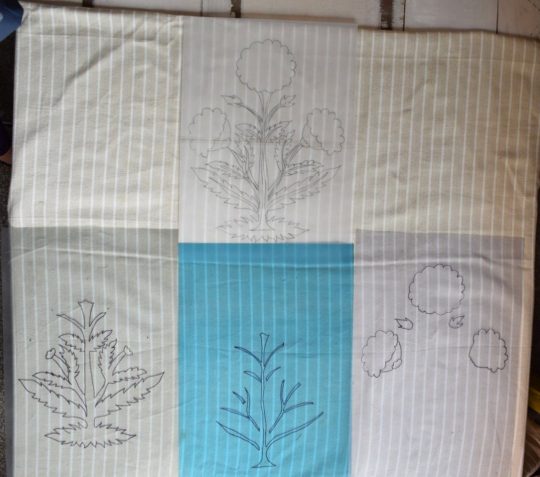
If you look at the original block print, it has almost five colors. Black outline, green and dark green stalk and pink n orange flowers. Now black outline is impossible to achieve in a stencil, it is going to be frustrating to even try, so I skipped it. The colors of the flower can be managed on one stencil. The stalk needed be split into two to achieve the two tone effect. So we took the original design and split it into three separate drawings.
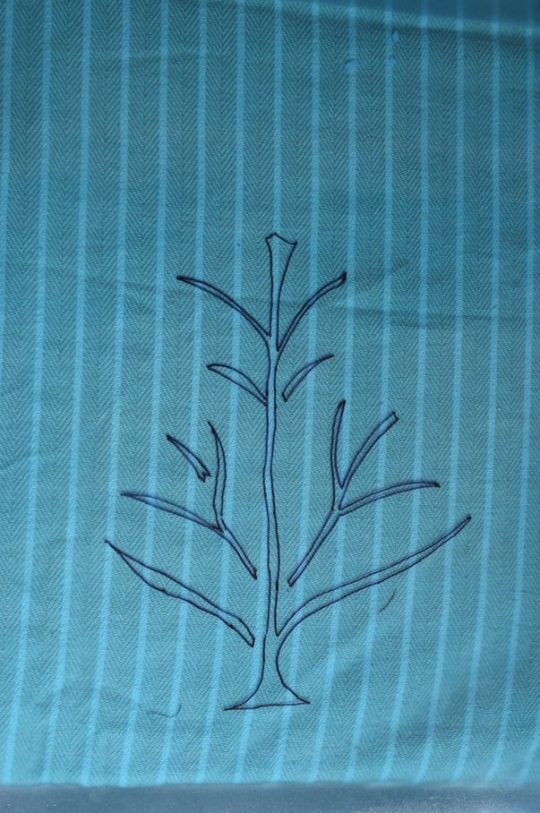
- The outer stalk
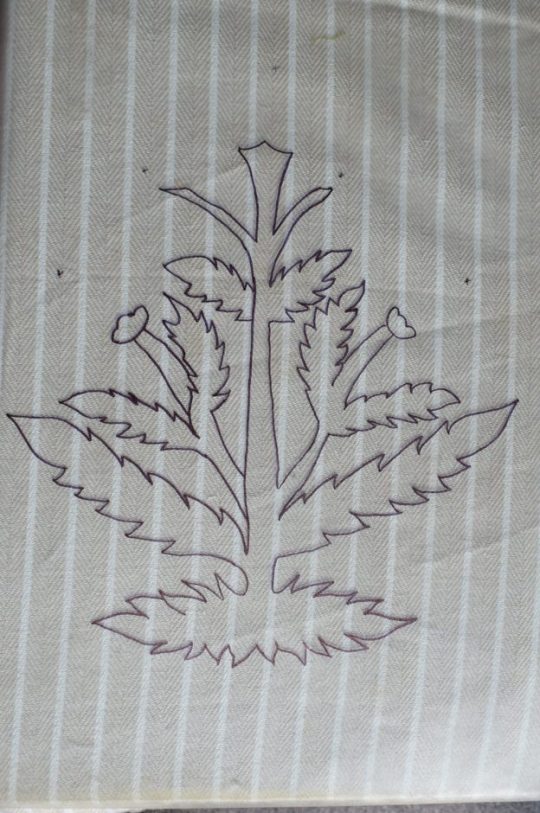
2.The inner viens
3.The flowers and buds
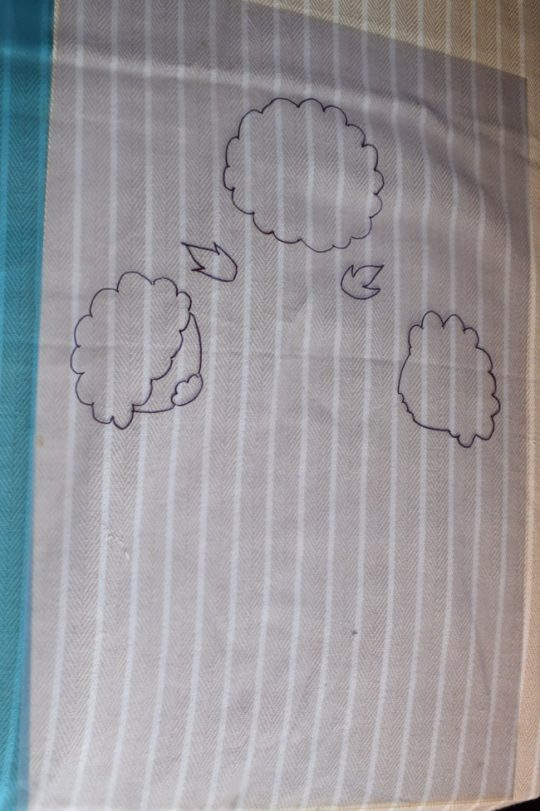
So just like how there is one block for every color that gets printed on the fabric, we make one stencil for each color. To understand what I mean, here is the original design and the three split stencils together.
So once you’ve split the designs, its only a matter if keeping the OHP sheet on top of the design and tracing it out with a CD marker. CD markers are permanent and dont smudge when you draw on OHP sheets.
Then, Place the OHP sheet on a cutting mat and cut along the line of the design you have traced.
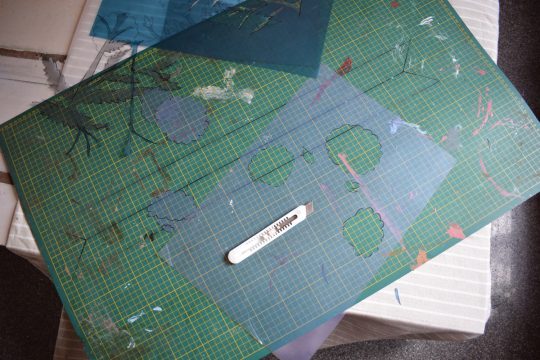
Please dont judge my cutting mat, it belongs to a serial DIYer and is well used, making sure its worth every penny.
If you have been following me on Instagram, you know I have printed this design on the walls of a project and it looks absolutely stunning in every way. I plan to print the very same design on fabric, so stay tuned for that DIY post.

I know there are a lot of single color stencils available in the market, you can make a single color stencil using the same method too. But why do simple when you can so exotic 😀
P.s. If you are stenciling the wall, use insulation tape to hold the stencil in place while you apply color. It holds and comes off clean.
Leave a Reply